Final Cut Pro 7, custom effects are made out of already existing effects (the ones by default in the Effects window), it is the modifications done on the original effects that we save as custom effects.
Transition Effects
Video
- Apply, on one of your clips, a transition effect that looks almost like the one you want to create;1
- double click on the effect or right click on it > Open ‘Name of the effect’;
- then appears, in the Viewer, the effect editor: make the modifications suiting your needs (for a transition effect, its duration can be changed in the Timecode Duration field in the upper-left corner of the viewer);
- now you can save it as a custom effect either by:
- going to Effects > Make Favourite Effect or press the alt + f keys and it will add it to the Favorites bin in the Effects window;
- or grabbing the grab hand icon (upper-right corner of the Viewer window) and dropping it in a bin of your choice;

In the upper-right corner of a transition’s Effect Editor, there is a grab hand icon which represents the effect. The icon can be grabbed and dropped in whatever bin of your project.
- the newly created effect acts like any other effects, so you can modify its parameters, rename it etc.
Audio
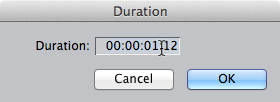
By default, there are only two Audio transitions in Final Cut Pro, and the only thing we can change is their duration:
- from the Effect window, double click on the audio transition, a duration window appears;
- change the duration value;
- press OK to confirm the change.
From there the transition effect keeps the last duration value entered and saved. However, we can’t save different duration’s values as different transition effects; if you need the effect with different durations you have to change its duration field every time you need a different duration.

Effect Filters
Effect Filters, either video or audio, don’t have the grab hand icon like for the video transition effects (by default as we will see there is an exception). But we still can save custom filters and it works for both audio and video filters:
- on one of your clips apply a filter that looks almost like the one you want to create;2
- double click on the clip, on which the filter is applied, in order to open the clip’s Filter window in the Viewer;
- do all the modifications you want. If at some points it is going nowhere you can always reset the default values by clicking the red cross, in the Nav column of the filter;

Filters (and the by default Motion parameters) have a reset button, symbolised by a red cross. Sometimes useful when, doing a colour correction for example, we end up not knowing what color we were trying to correct… - once satisfied go to Effects > Make Favourite Effect or do alt + f: it will put the custom filter into the Favorites bin in the Effects window;

When saving a filter, by selecting Make Favorite Effect, the customised filter will be saved in the Favorites bin of the Effects window. - like for the transition effects, the newly created filter can have its parameters or name changed.
From the Favorites bin you can grab the newly created filters and drop in to another bin. It will not move the effect but copy it, thus letting one copy on the Favorites folder.
Exception
When is time to save a colour correction filter, the Effects > Make Favorite Effect option works fine. But we also can grab and drop an effect icon when in visual mode, like for the transition effects:
- when you apply a Color Corrector 3-way filter you can work on colour wheels (the way I prefer personally) by clicking the Visual button next to the filter name, in the Filters Editor of a selected clip;
- in the Viewer, a new tab opens called Color Corrector 3-way. There you have your colour wheels on which you can work;
- once satisfied with your colour correction you can save the modifications as a new colour correction filter by grabbing the Grab Filter button (beneath the Numeric button) and dropping it in a bin of your choice.

With the Color Corrector 3-way filter, when in Visual mode, you can save your own colour correction, as a new filter, by grabbing the Drag Filter button and dropping it in one of your bin or even straight on a clip in your timeline.
The End


