In the course of our animation we might want to duplicate an instance/drawing and use it several times in the same timeline. Then, further down the line, we might eventually change the lines of this specific instance/drawing and wish the changes to be also applied on the duplicated instance(s).
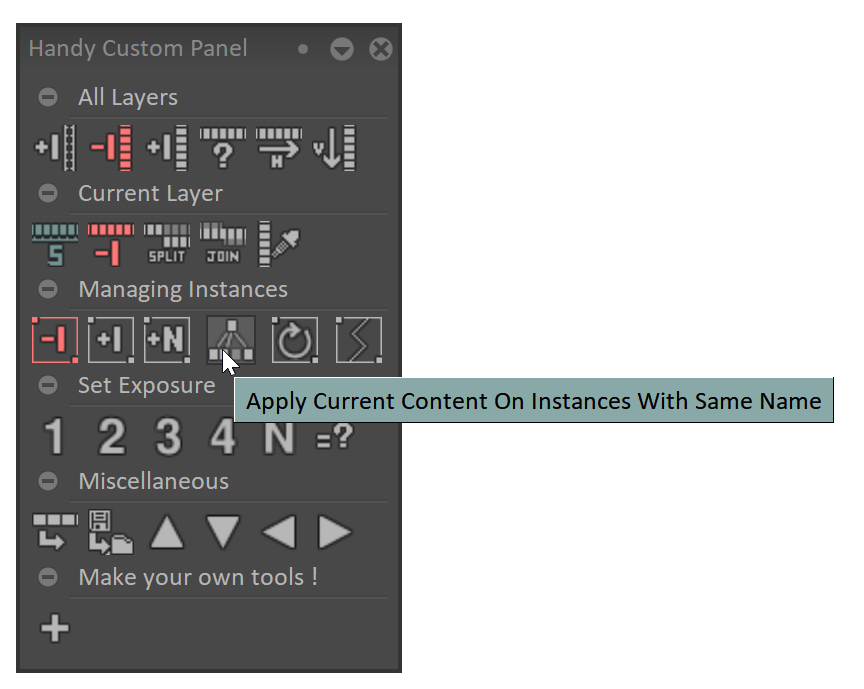
In a software such as Toon Boom Harmony it is done by default: we copy a drawing, paste somewhere else in the timeline, and any changes made on one of the drawings will be applied on its duplicated self. In TVPaint, to achieve the same thing, we need to use the Apply Current Content On Instances With Same Name option in the Handy Custom Panel.

Let us see how we go about it.
A video demonstration
Apply instance names
The notion of instance name is primordial for the whole of the procedure to work.
What really matters here is for each of our instances/drawings in the timeline to be assigned an instance name.
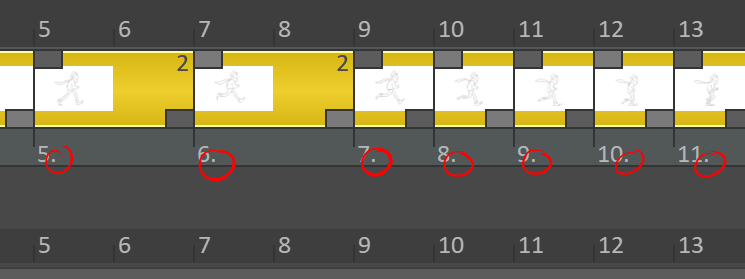
When we first create a timeline, the instances will show numbers underneath each of them, but these are not instance names per se, they are more like instance numbers. Those numbers have a dot just after them, something like ‘1.’ or ’34.’.

To check whether they are “proper” instance names or not, we can copy an instance (CTRL + C) to paste it (CTRL + V) elsewhere in the timeline: if the duplicated instance has a different number shown underneath it than the original one, then that means instance names have not being applied to our instances. And that is typically what happens when you first create a timeline.
So in order to apply “proper” instance names to our instances/drawings we need to rename them.
Note: if you are about to do this on an already existing timeline, I would recommend that you duplicate your timeline/scene first and attempt what follows on the duplicated timeline so not to mess up too much with the original scene.
It is possible to add text to our instance names like ‘hero_1’, ‘hero_2’, for example; it doesn’t have to be just numbers. But to keep it simple, here we are going to apply instance names in the form of numbers. So we first:
- right click underneath one of the instance in our timeline;
- go to Rename > Smart;
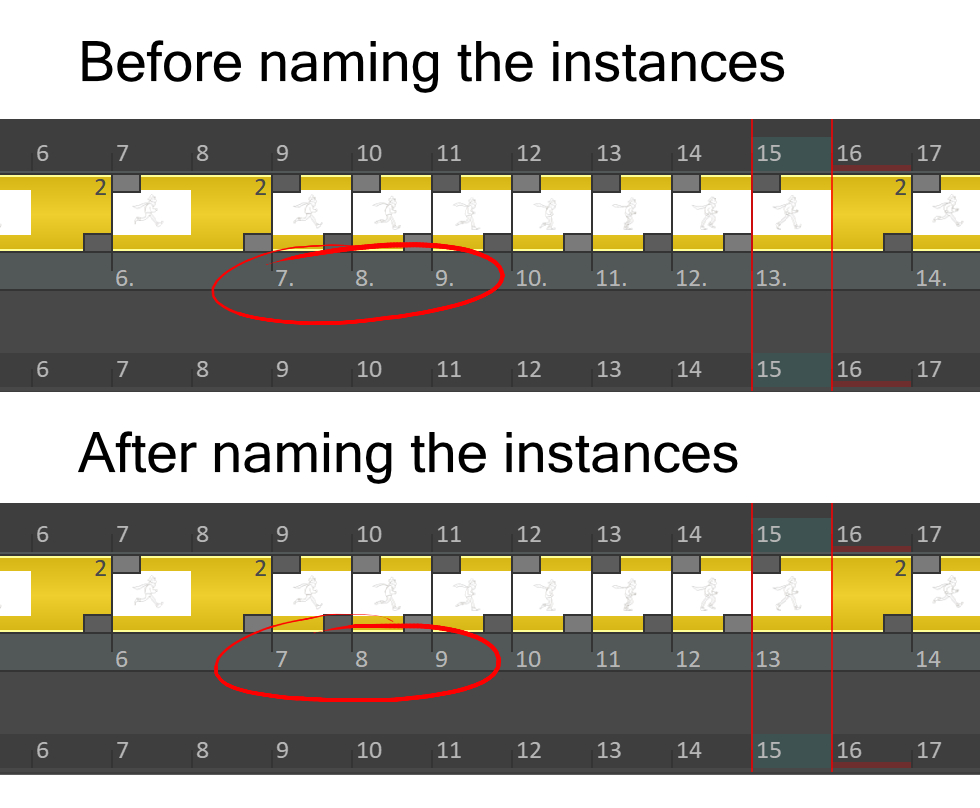
- pops up a little window called ‘Smart Instances Rename’ in which we can define the name we want to apply to our instances. Here we are going to leave the ‘Prefix’ and ‘Suffix’ fields empty and have all three ‘Process’ option to be ticked, then we press OK.
At first we might not see a big difference but each of our instances have now a number applied to it, and it is a “proper” instance name. There are two ways to be sure of it:
- either by not seeing dots after the numbers,
- or by duplicating one instance in the timeline and see that both instances have the same number underneath.

Sharing an instance name creates a link between these instances allowing these to share the same content.
So now that our instances are properly set, we can try with a practical example of updating the content of duplicated instances all at once.
Procedure
- First copy the instance (CTRL + C) we want to duplicate and then paste it (CTRL + V) elsewhere in the timeline. The copied/duplicated instance will inherit the same instance name.
- We do changes on one of the instances (the original or the copied one).
- Then, while still on the instance we modified in the timeline, we go in the Handy Custom Panel1 and press the Apply Current Content On Instances With Same Name button, under the ‘Managing Instances’ section. The icon of this button has five little cubes in it.

In the Handy Custom Panel, under Managing instances, here lies the button. - We now see that the changes made are applied on the duplicated instance. This is the case simply because both instances share the same instance name.
In this case, only one copy of the instance has been made, but it is possible to make more than one copy of an instance. And as with the example above, all new copies of the instance will share the same instance name.
So if we duplicate an instance three times, we end up with four instances sharing the same instance name and on which we can apply a same change, done only on one of the instance in question, all at once.
Break the link
If at some point we wish not to see the content of one of the duplicated instances replicated in its duplicated selves anymore, we simply need to change the instance name of this particular instance by:
- right clicking on the instance in question;
- then choosing Rename > Current Instance;
- to finally typing a new name in the ‘Instance Name’ windows that pops up, that we confirm by pressing OK.

Renaming an instance.
Renaming the instance name of the instance means that the link between this instance and the other duplicated instances is broken, and they don’t share the same content anymore.
The End

